Hi everyone!
 |
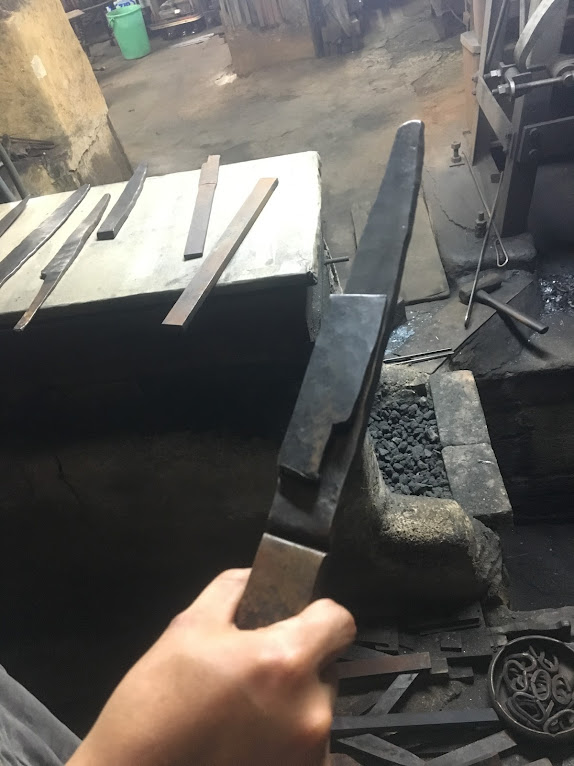
Me (sweating profusely)
in the Mizuno Tanrejo forge |
It’s me, well-rested and back to share more of what I’ve learned so far on my travels. This morning I’m starting this post over a cold brew in Osaka’s America-Mura, a hub of youth culture. Most of the stores in the area sell sneakers, street style apparel, or a combination of both. I passed a store selling NBA apparel and had to consciously avoid the temptation to go in and look for Raptors gear. Just like East meets West here in America-Mura (or at least it did 30 years ago when this area was all American import stores), East meets West yet again in two days in California. Raps in 6.
Anyway, as I mentioned, I wanted to continue this series by sharing more about the Sakai specific process of knifemaking. The traditional techniques of forging originated because of the limited natural resources available in Japan, and the need to effectively combine steel with less costly iron. Originally, the steel used in sword and katana production was tamahagane, which had to be smelted and produced from iron sand. Sakai knives are made now not from tamahagane, but are still made through a similar “hammering” process which breaks steel crystals into small parts and strengthens the metal in a craft of fire, iron, and water. Knives now can be made with blue steel, white steel, damascus steel, or stainless steel. Blue steel is harder than white steel, but according to Nino, who graciously showed me around the Yamawaki Cutlery workshop, some chefs prefer white steel because it is easier to re-sharpen the blades every night. This is essential for chefs - for instance, those who prepare sashimi require an incredibly sharp yanagi knife to produce high quality sashimi. I’ll be further addressing why this is in my final post, but for now, enjoy an overview of the Sakai knifemaking process itself.
The forging, or hammering process, is the first step to creating a blade. A piece of hagane hard steel, the back of the blade, and a jigane soft iron, are put together and heated until red hot, and then struck repeatedly to weld the metals and throw off foreign substances. I visited Mizuno Tanrejo’s workshop, a family business that has existed in the same place since 1872, and was told that the reason a forge is kept dark is because the smiths must be able to see the colour of the fire when working. If the fire is blue, the heat is too low, and if it’s white, it’s high. Smiths determine the temperature of the fire and the blade only by seeing and feeling the heat, which can reach over 1000° celsius. The heating and hammering process of forging is repeated a number of times to weld and shape the blade. In between rounds, the shaped blade is headed and then quenched in water to harden the the hagane steel, which eventually is made flat. This steel forms the straight, strong cutting edge of the blade, whereas the core of the knife, the jigane, is more flexible. Characteristically, Japanese knives have one side that holds an extremely sharp cutting edge, making them single ground/single bevel.
 |
| Hagane and Jigane before being merged |
 |
| Hammer in the Mizuno Tanrejo forge |
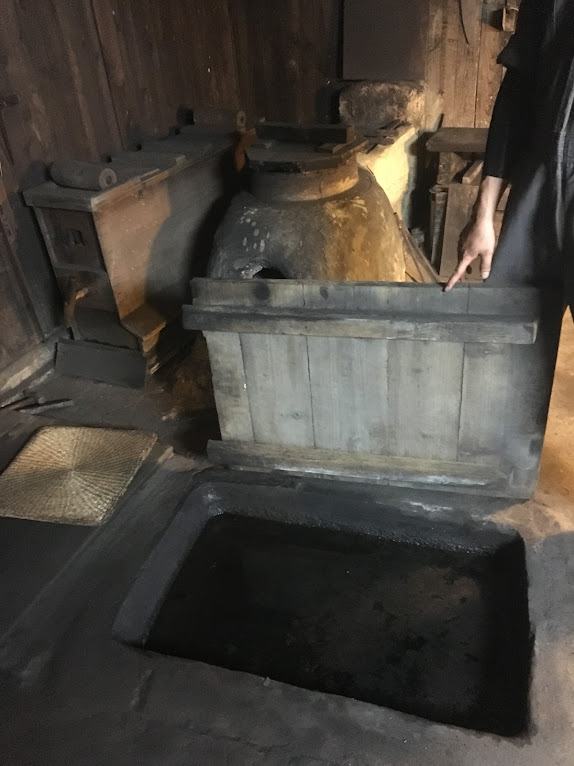 |
| Pit where a heated blade is quenched (oven behind) |
After the metal body of the knife is forged, the part is ready to move into the hands of the next craftsman: the sharpener. I was lucky to visit the Yamawaki Cutlery factory, owner of the Goh Umanosuke Yoshihiro brand. Here, in a separate building from the main office and workshop for attaching handles and engraving blades, I spoke to Nino and watched two young masters work on sharpening the blades. They sharpen 10-20 blades a day, which are delivered in their coarse form from blacksmiths.
Standing at one of four sharpening wheels, a worker holds a blade against the spinning wheel, where it throws off sparks, then holds it up to check for distortions, and places it back on the wheel again. I ask if it takes a lot of strength, and get a response that it doesn’t take power. But clearly it takes focus and concentration, as the artisan repeats the process and uses his senses to determine differences in the edge of the blade and its sharpness, intuitively spotting what needs work and placing the knife at a specific angle on the grinder. Apart from using the wheels and molds, a hammer and chisel are also used in this stage to assist with shaping the urasuki (concave on the backside of the knife) that allows the blade to be sharp and single-edged. Throughout the process, distortions and deformations are spotted and immediately corrected to ensure a perfectly straight blade. The blade continues to be sharpened and buffed, ending with a beautifully gleaming blade.
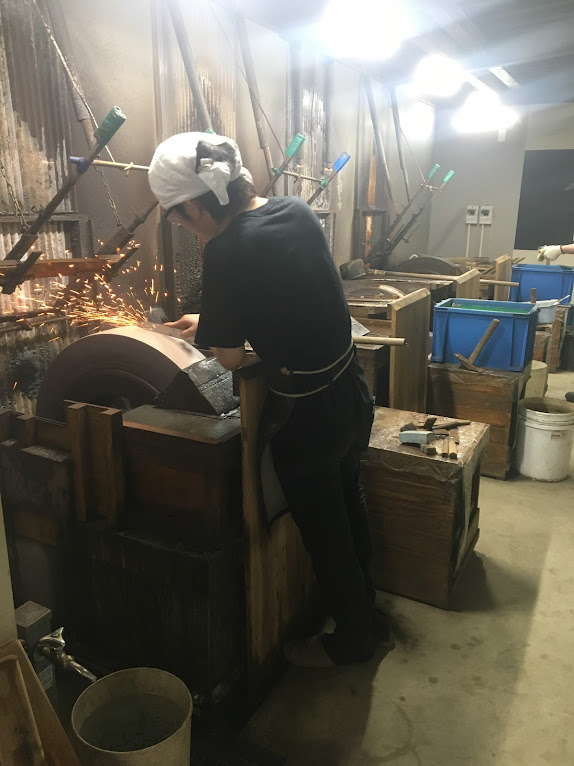 |
| Sharpening a blade |
 |
| Checking and correcting deformations |
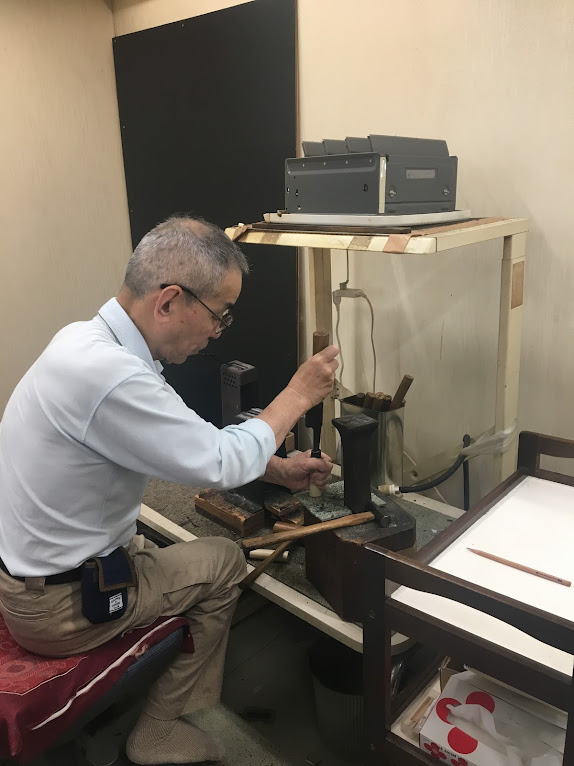
From here, the polished blade moves to the final artisan, who attaches the handle to the blade and engraves it. This part of the workshop is in the main building, in a brightly lit, organized room with mats laid on the floor and many stacks of containers of knives. In the corner, I watch a master heat a blade, then attach it to a handle. He pays particular attention to particular angle at which the blade is attached, adjusting or correcting distortions if necessary. I watch him do this efficiently and quickly with four knives. Lastly, he brings them over to a small block and chair, where he engraves a seal onto the blade by using a small hammer and chisel. It takes him less than five minutes to deftly engrave a knife. These knives are now ready to be sent out, sold, and used and cared for for many years to come.
 |
| Engraving the blade |
 |
| Attaching a handle |
 |
| A final product! |
Today was a humbling experience. I am awed and overwhelmed by the kindness and hospitality of the people I met today, from salesmen to artisans to company owners. Even with a language barrier, they were welcoming and communicative, and I hope that I was able to convey my gratitude. I am deeply honoured to have observed these craftsmen at work, amazed by the skill they possess, and appreciative of the beauty and utility of their products. Once I get off the HUDS meal plan, I know where I’ll be going to stock up my kitchen! Stay tuned for my final post, in which I’ll be sharing what I’ve learned about various chefs knives and the cuisine they contribute to.
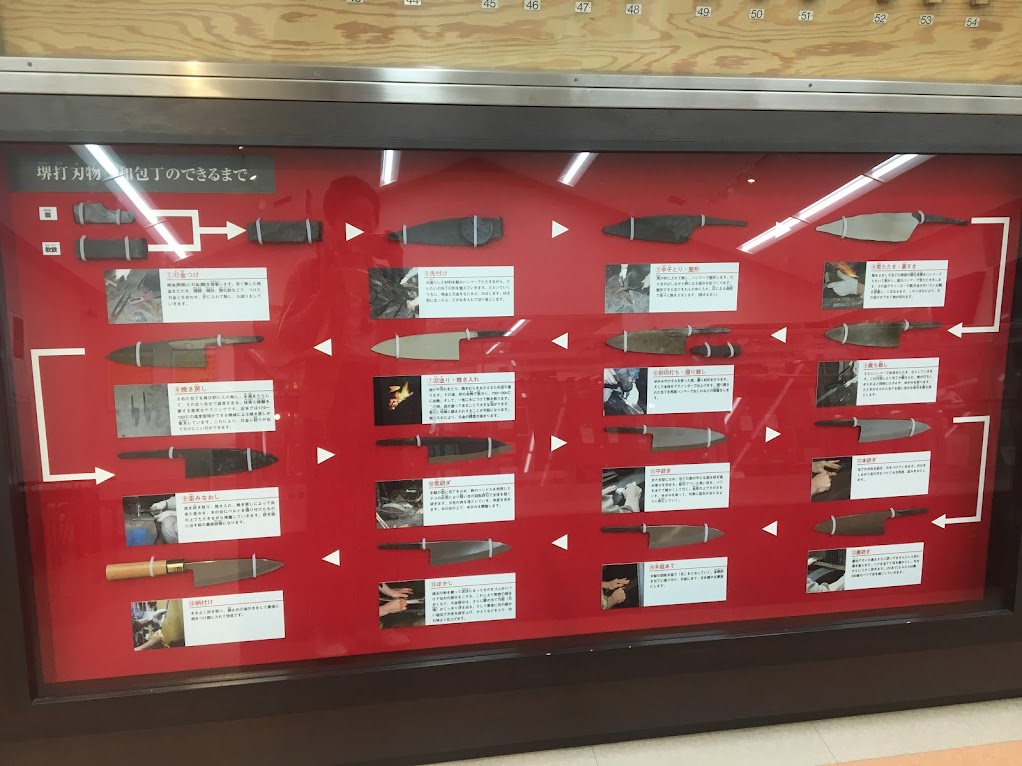 |
| Overview of steps of knife production as seen in the Sakai Hamono Museum |
Till then,
Erin
This is so well done and interesting, Erin!
ReplyDelete